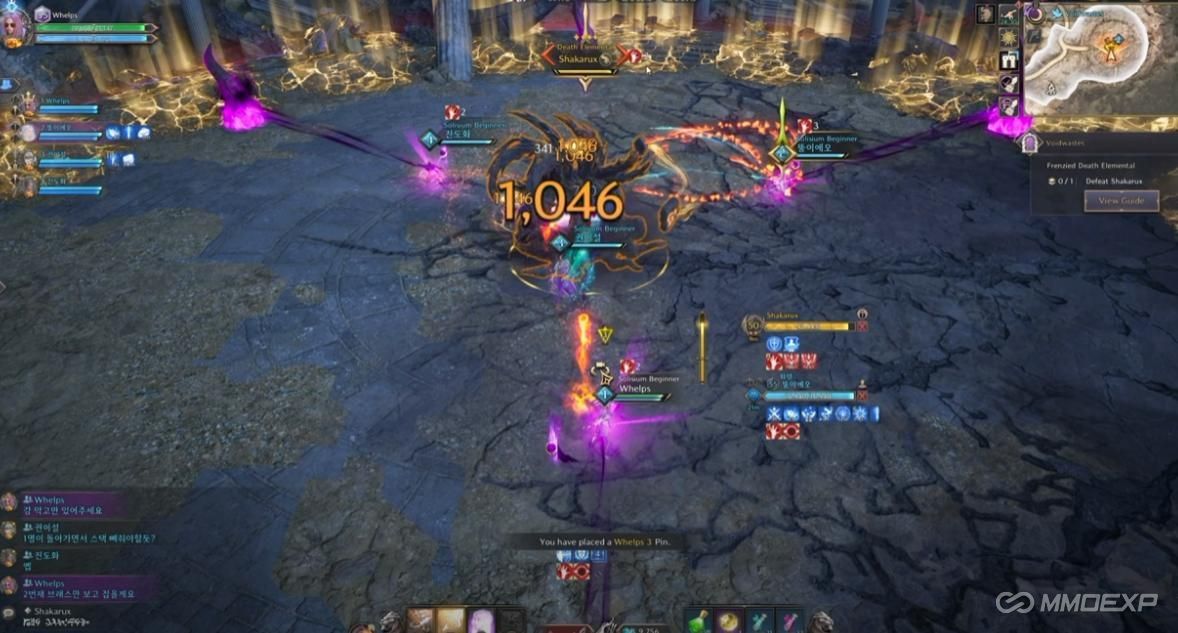
The Void is one of the most challenging fights in Throne and Liberty, requiring excellent coordination between all players. This guide will help you understand the key mechanics of the boss fight and provide strategies for a successful completion. We'll cover the setup, positioning, and tactics you need to execute in order to defeat the boss and avoid total team annihilation. Before we get into the details of the build, whether you're struggling to gather materials, need rare equipment, or want to speed up your progression, MMOexp offers services like buying Throne and Liberty Lucent, the in-game currency that can give you the edge you need.

Pre-Fight Setup: Pin Placement and Role Assignments
Before engaging the boss, the key to a successful fight is setting up your pins and assigning roles properly. The boss encounter revolves around blocking a critical mechanic using six pins, so it's important to coordinate these placements effectively.
1. Pin Setup: There are six pins in total, and these should be placed in line with the six horns on the battlefield. You’ll want to divide these pins into three pairs. Here’s a breakdown:
Pin Pair 1: Assign one tank and one healer to this pair.
Pin Pair 2: Assign one range DPS and one melee DPS to this pair.
Pin Pair 3: For groups with all ranged DPS, you can decide which ranged DPS will be in the front and which one will stay at the back. You can also assign personal pins to ensure you're always aware of where you need to be.
2. Why Pins Matter: These pins are essential for blocking the boss’s line attacks, which are critical for avoiding a wipe. Each pair of pins will be responsible for blocking the line of sight between the boss and their associated horns. Failing to block these lines results in stacking up the boss’s buffs, leading to a wipe if it reaches 30 stacks.
Boss Mechanics: Phase-by-Phase Breakdown
Once the fight begins, the boss will initiate various mechanics that you must respond to quickly to avoid damage and death. Here’s a step-by-step breakdown of the key phases.
1. Diamond Free Attack
The Start: As soon as the boss is pulled, they will perform a “Diamond Free” attack. This attack will target specific players in the raid, and you’ll need to dodge accordingly to avoid taking damage.
Pin Mechanics: If you are assigned to Pins 1 and 2, you’ll need to position yourself between the boss and the line of sight to the horn. This will block the attack and prevent it from hitting the boss. Be careful—if the line hits the boss, they will gain stacks that can lead to a wipe if they reach 30.
2. Red Marker and Black Hole
· Red Marker: At 90% HP, the boss will mark the furthest player with a red marker, similar to the one you see in the Cursed Waste. This red marker will create a massive black hole, and there are two ways to deal with it:
o Method 1: Run all the way back to the horn assigned to you. Once the red marker disappears, you can run forward to avoid the black hole.
o Method 2: If the black hole is too large to avoid, you can drop it next to the horn nearest to you and then return to your position.
· Yellow Pools and Breath Mechanic: After the black hole, the boss will drop two yellow pools at random locations. One of these pools will be linked to a breath mechanic. The closest player (usually the tank) will receive the yellow orb, and the raid must break two yellow horns with yellow orbs on them.
o Breath Attack: Once you’ve positioned the boss with the correct horns in line, the boss will breathe in a specific direction. When this happens, move the boss to hit the horns with the breath attack to break them. Failing to break the horns results in a significant AOE damage.
3. Yellow O Orbs (HP Check)
· AOE Damage: As the fight progresses, especially under 40% HP, everyone will be assigned a yellow orb. This orb does significant damage, so it’s crucial that players remain close to the boss to stay in range of the healer’s AOE healing. Healers should focus on keeping everyone topped off here to prevent any unexpected one-shots.
· Skill Damage Resist: To mitigate the damage from the orbs, you can use gear or traits that boost your skill damage resistance, which will help reduce the impact of these orbs.
4. Repeat and Phase Transition
· Repeat Phase Mechanics: Once the boss reaches 40% HP, the boss will repeat several of these mechanics with increased frequency. At this stage, expect the Breath Mechanic to occur twice in quick succession, so ensure the tank keeps the boss close and consistently lined up for the breath attacks.
· Consistent Positioning: The key to survival is maintaining your pin positions and always returning to your designated spots after each mechanic. If you fail to do so, you risk wiping the raid due to a missed line block or breath mechanic.
Conclusion: Rinse and Repeat
This fight plays out a bit like a “repeat” scenario as you continue to manage the pin mechanics, red markers, yellow pools, and breath attacks. By carefully coordinating your actions and making sure all players are in the right positions, you can take down the boss without any problems. Finally, if you’re looking to take your Throne and Liberty gameplay to the next level, buying TL Lucent from MMOexp is an excellent way to boost your progression.
Remember that communication is key, especially when dealing with red markers, black holes, and yellow orbs. Keep calm, follow the strategy, and soon enough, you’ll be conquering the Void wasteland bosses in Throne and Liberty. Good luck and happy hunting!
MMOexp Throne and Liberty Team