Today, I’m excited to walk you through one of the most insane builds in Elden Ring: the Giant Smasher build. This powerful build is capable of annihilating the most powerful enemies, including the infamous Ranni and other final bosses, in a matter of seconds. Before we get into the details of the build, If you’re looking to level up your gameplay without the grind, MMOexp is your go-to resource. With a wide selection of Elden Ring Runes available for purchase, you can quickly amass the resources you need to enhance your builds and dominate your foes. Now, let’s get into the details of this incredible build!
Weapon Choice: The Giant Crusher
For this build, we’ll focus on the Giant Crusher, a colossal hammer known for its devastating power and staggering attack potential. This weapon features a strong charge attack that can quickly stun enemies, making it ideal for boss encounters.
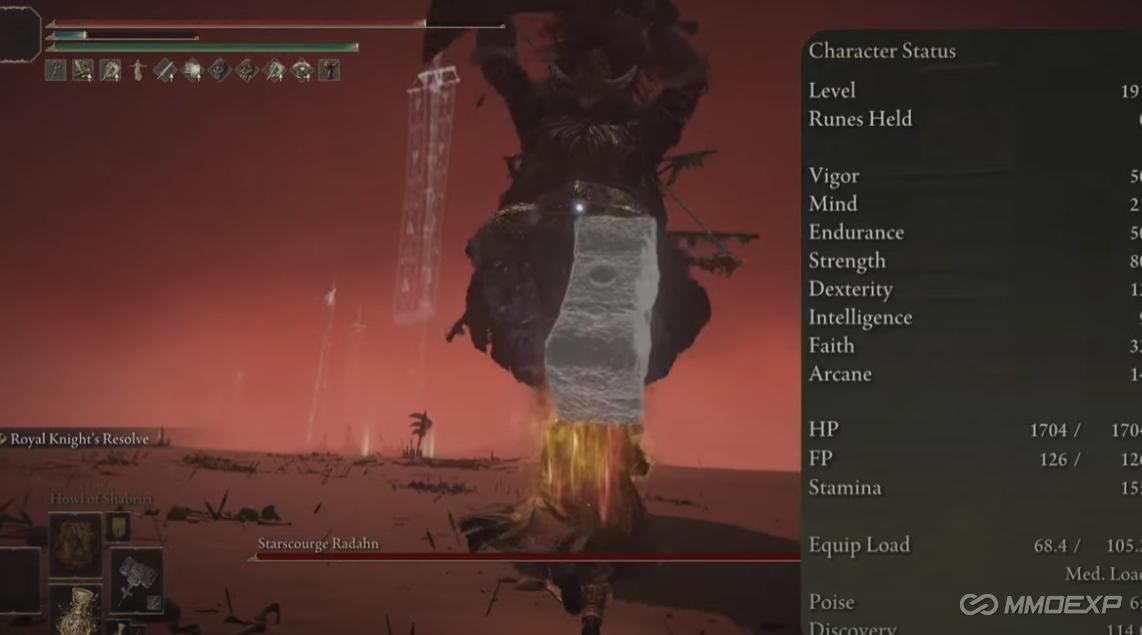
Ash of War: Royal Knight's Resolve
Pair the Giant Crusher with the Ash of War: Royal Knight's Resolve. This ability grants a whopping 80% increase in damage for your next attack. Given that the Giant Crusher thrives on charge attacks, this synergy is perfect. Charge up your attacks, unleash Royal Knight's Resolve, and watch enemies crumble before you.
Essential Seals: Dragon Communion Seal
Next, we’ll need a seal for casting spells. The Dragon Communion Seal is my recommended choice. It’s lightweight and easily obtainable early in the game, allowing you to boost your damage without burdening your character.
Recommended Attributes
To maximize the potential of the Giant Crusher build, focus on the following attributes:
· Strength: This is your primary attribute, directly increasing the damage output of your colossal weapon.
· Endurance: Boosting your stamina will allow you to unleash multiple charge attacks without running out of breath.
· Vigor: Ensure you have enough health to survive tough encounters, especially during boss fights.
Armor Selection
For armor, I recommend using the Black Dumpling set. This armor provides a nice balance of damage resistance and mobility. The unique perk of this set is that after you suffer Madness, it boosts all damage by 10% for 60 seconds. This can be a game-changer in intense battles.
Talisman Recommendations
Equip the following talismans to maximize your damage potential:
1. Ax Talisman: Increases charge attack damage by 10%. Essential for this build.
2. Blade of Mercy Talisman: Raises your attack power by 20% after each critical hit.
3. Two-Handed Sword Talisman: Enhances attacks with two-handed weapons by 15%.
4. Agent One Cell Rotation Talisman: Increases attack power by 20% for 30 seconds when Madness is in the vicinity.
5. Dagger Talisman (optional): Increases critical damage by 17%.
Tiers for Buffs
For the buffs, I suggest using:
· Spy Crack Turt: Stacks with the Ax Talisman, increasing charge attacks by 25%.
· Block Sucking Crack Turt: Increases damage by 20%.
Buffs for Maximum Damage
To further amplify your damage output, use the following buffs:
1. Golden Bow: Increases damage by 15%.
2. HCH Brewery: Increases damage by 25% and causes Madness build-up in the surrounding area.
3. Ming Hand: Grants an additional 7.5% more damage when Madness is present.
Recommended Order for Buff Usage
1. Activate Golden Bow for a baseline damage boost.
2. Follow with HCH Brewery for a significant increase and Madness build-up.
3. Finally, use Ming Hand to cap off your buffs.
Putting It All Together
Now that we’ve covered the essentials, it’s time to test this build against some of the game’s most formidable bosses. Equip your Giant Crusher, activate your buffs in the recommended order, and prepare to unleash devastating charge attacks on your enemies.
Combat Strategy
· Start with your buffs to ensure maximum damage before engaging.
· Use Royal Knight's Resolve to charge your first attack; this will set the tone for the battle.
· Target enemies with your charged attacks to stagger them, creating opportunities for follow-up hits.
· Utilize the Dragon Communion Seal for healing or offensive spells if needed during tough encounters.
Final Thoughts
That's the build for the ultimate mega-smasher in Elden Ring! With this setup, you'll be ready to take on any challenge and leave a trail of destruction in your wake. Finally, if you're eager to enhance your Elden Ring adventure without breaking the bank, MMOexp has you covered with an impressive selection of cheap Elden Ring Items. Whether you're hunting for rare gear or essential consumables, their marketplace offers unbeatable prices that won't dent your rune stash. Happy gaming, Tarnished!
MMOexp Elden Ring Team